by GenericJam
Tags: wasting, time, old, fashioned, way
The Hero Begins His Journey
… or her journey if you’re a her and you’re going on the exact same journey… which would be weird because the work is already done.. you just have to copy/paste now (go to the end).
This is best experienced as a Livebook as it will let you play along and modify code examples yourself. Download this article as a Livebook. Before you go grab Dan and Valhalla. You’ll need them where you’re going! If you’re viewing the Livebook run the code with the play button at the top of each cell. If you don’t you won’t see the generated images and the article is going to be rather confusing. Also if you’re new to Livebook, the first one to run is the cell at the top of the page as that loads your dependencies.
Dramatic Tension
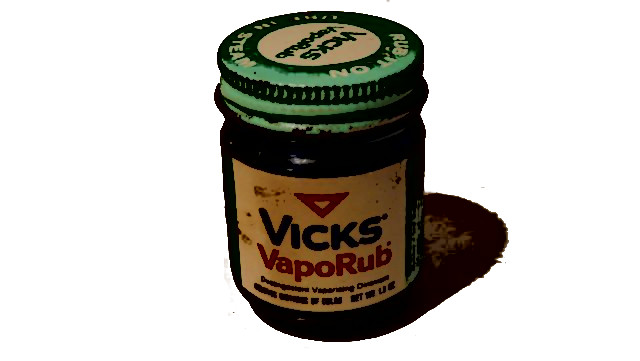
We’ve all been working from our bedrooms and broom closets for the past couple of years. Our employers realized having us work from home is cheaper than renting out office space so it appears the trend is here to stay. I decided to up my video presentation game with a green screen. In the days of Star Wars they needed the background screen to be green so they could remove it with analog methods. With modern digital processing you can trivially remove almost any color but it’s useful if it’s a color people are less likely to wear so green is still the traditional choice. These days it’s also known as chroma key removal as it can be any range of colors.
I tried OBS for background removal which worked okaaay but it introduced a lag which unsynced my mouth and my voice which betrayed the fact I wasn’t actually standing on the rings of Saturn. I tried wearing a space suit to try to sell it but it’s so hard to type with those bulky gloves. After a short unsuccessful search looking for a ready made open source alternative I resolved to do what any self respecting programmer would do: write the chroma key remover myself!
As you may know, video is actually just a series of pictures played fast enough to trick your brain into thinking it’s seeing actual motion. A sensible first step is to figure out how to do this for one image which we could turn into one frame and then just do that 30 times a second. The only language I’m interested in using for any project is Elixir so that’s where we’ll start.
This is just an arbitrary example that happens to work well for the three options I’ve chosen to showcase. Depending on what you’re trying to do with image processing you may find different results.
Install the Libraries
Put these in your mix.exs.
defp deps do
[
  {:nx, "~> 0.4.1"},
  {:stb_image, "~> 0.6.0"},
  {:kino, "~> 0.8.0"},
  {:vix, "~> 0.15.1"},
  {:image, "~> 0.17.0"},
  {:evision, "~> 0.1.25"}
]
Elixir… for Images… ?
I didn’t think Elixir would be any good at this as it’s not really known for its number crunching prowess. In fact NIFs have been the answer to this type of a problem on the BEAM forever. I knew that Nx is being actively developed and that it gave access to the GPU which is a good place to start for images (gamers haven’t been grinding it out for years in front of their screens just to benefit the crypto bros). Spoiler: NIFs are still the answer, they’re just gift wrapped for you now.
I started poking around Nx looking for answers. I found there’s already a library in the Nx suite called StbImage which does just what you’d want: load an image into Nx.
For the uninitiated, an image is just a large table (matrix, tensor or array which are somewhat interchangeable in the space) which holds values which represent each of the pixels. If the image is a bitmap (.bmp) that’s exactly what it is but most images (.png, .jpg, .gif, etc.) use some sort of compression to save space and bandwidth. Typically whatever library you use to open it will decompress it for you and give you a matrix of values. The most typical is three numbers, one each for red, green and blue. Most commonly these are numbers between 0-255 which gives almost 17 million possibilities for colors which is generally good enough and is pretty easy to represent, translates well for the web, etc. So [192, 0, 0] would be a deep red, [192, 0, 192] would be purple, etc. If all three values are 255 that’s white. If all three are 0 that’s black. If all three are more or less the same it’s grey. If it’s a .png or .gif it also may have an alpha channel (also 0-255) which represents transparency (also called opacity by those in the know). This knowledge might come in handy later.
A Simple Example
I find it helpful to start off super basic. Let’s look at a small image. This is the smallest image I can pretend is interesting. If you stare at it and blur your eyes a bit a certain shape may emerge. Can you guess what it is? This is the image in a table:
| [r, g, b] | [r, g, b] | [r, g, b] | [r, g, b] | [r, g, b] | [r, g, b] | [r, g, b] | [r, g, b] |
|---|---|---|---|---|---|---|---|
| [255, 255, 255] | [255, 255, 255] | [255, 255, 255] | [255, 255, 255] | [255, 255, 255] | [255, 255, 255] | [255, 255, 255] | [255, 255, 255] |
| [255, 255, 255] | [171, 0, 0] | [171, 0, 0] | [255, 255, 255] | [255, 255, 255] | [171, 0, 0] | [171, 0, 0] | [255, 255, 255] |
| [171, 0, 0] | [255, 255, 255] | [230, 0, 0] | [171, 0, 0] | [171, 0, 0] | [230, 0, 0] | [230, 0, 0] | [171, 0, 0] |
| [171, 0, 0] | [230, 0, 0] | [230, 0, 0] | [230, 0, 0] | [230, 0, 0] | [230, 0, 0] | [230, 0, 0] | [171, 0, 0] |
| [255, 255, 255] | [171, 0, 0] | [230, 0, 0] | [230, 0, 0] | [230, 0, 0] | [230, 0, 0] | [171, 0, 0] | [255, 255, 255] |
| [255, 255, 255] | [255, 255, 255] | [171, 0, 0] | [230, 0, 0] | [230, 0, 0] | [171, 0, 0] | [255, 255, 255] | [255, 255, 255] |
| [255, 255, 255] | [255, 255, 255] | [255, 255, 255] | [171, 0, 0] | [171, 0, 0] | [255, 255, 255] | [255, 255, 255] | [255, 255, 255] |
| [255, 255, 255] | [255, 255, 255] | [255, 255, 255] | [255, 255, 255] | [255, 255, 255] | [255, 255, 255] | [255, 255, 255] | [255, 255, 255] |
This is the same image as above in Elixir code. If you copied and pasted it into Livebook it would display the image afterward as you see below.
# The image as code
image =
  Nx.tensor(
    [
      [
        [255, 255, 255],
        [255, 255, 255],
        [255, 255, 255],
        [255, 255, 255],
        [255, 255, 255],
        [255, 255, 255],
        [255, 255, 255],
        [255, 255, 255]
      ],
      [
        [255, 255, 255],
        [171, 0, 0],
        [171, 0, 0],
        [255, 255, 255],
        [255, 255, 255],
        [171, 0, 0],
        [171, 0, 0],
        [255, 255, 255]
      ],
      [
        [171, 0, 0],
        [255, 255, 255],
        [230, 0, 0],
        [171, 0, 0],
        [171, 0, 0],
        [230, 0, 0],
        [230, 0, 0],
        [171, 0, 0]
      ],
      [
        [171, 0, 0],
        [230, 0, 0],
        [230, 0, 0],
        [230, 0, 0],
        [230, 0, 0],
        [230, 0, 0],
        [230, 0, 0],
        [171, 0, 0]
      ],
      [
        [255, 255, 255],
        [171, 0, 0],
        [230, 0, 0],
        [230, 0, 0],
        [230, 0, 0],
        [230, 0, 0],
        [171, 0, 0],
        [255, 255, 255]
      ],
      [
        [255, 255, 255],
        [255, 255, 255],
        [171, 0, 0],
        [230, 0, 0],
        [230, 0, 0],
        [171, 0, 0],
        [255, 255, 255],
        [255, 255, 255]
      ],
      [
        [255, 255, 255],
        [255, 255, 255],
        [255, 255, 255],
        [171, 0, 0],
        [171, 0, 0],
        [255, 255, 255],
        [255, 255, 255],
        [255, 255, 255]
      ],
      [
        [255, 255, 255],
        [255, 255, 255],
        [255, 255, 255],
        [255, 255, 255],
        [255, 255, 255],
        [255, 255, 255],
        [255, 255, 255],
        [255, 255, 255]
      ]
    ],
    type: {:u, 8},
    names: [:height, :width, :channels]
  )

StbImage.from_nx(image)
|> StbImage.to_binary(:png)
|> Kino.Image.new("image/png")
 It becomes that tiny red dot after we turn it into an image. That’s how big an 8x8 pixel image is. You may have to zoom in to see what it is. You can see it’s going to take a lot of these numbers to represent any sort of an image that actually looks recognizable.
Let’s Get Down to Business
The main idea with chroma key removal is to detect the background color you want to take out, remove it and merge it with a picture of The Restaurant at the End of the Universe or wherever you want to pretend to be.
You can get extra fancy by removing the pixels on the edge of that cutout that still look a bit green even though they actually fall outside the range. This has to do with the way we see color more than the pixels actually being green. Human psychology, isn’t it amazing… but you still have to account for that if you’re to convince you’re colleagues you’re not in the broom closet. There are other techniques too like turning down the opacity on the edge of the clipped image so it blends better with the background. We’ll see how far we get. I can’t make any promises this early in the game.
We only need two source images. You can use your own but I’m not adjusting for size so they need to be the same size. Also I’m using jpgs. If you want to use another type, you’ll have to adjust the code yourself.
# Adjust these to wherever/whatever images you want to use
foreground_image = "/where/i/keep/stuff/dan.jpg"
background_image = "/where/i/keep/stuff/valhalla.jpg"
Evision - Cue Frickin’ Lasers
I started with Evision because it seemed like it would be easiest. Evision is a new library that has bindings to OpenCV which stands for ‘Open Source Computer Vision Library’. It has been a standard go to library for ‘out of the box’ functionality for computer vision which is very useful if you just want to use the algorithms but you don’t care much how they work. It’s written primarily in C++ with it’s main set of bindings in Python. It’s been in use for several years and is quite stable as far as I know. Its main purpose is research so I would caution against using it in your production server. Evision is implemented using NIFs which tie directly to OpenCV which makes it fast… however the eternal caveat with NIFs is if they crash, it very well may take your BEAM with it. If your system is keeping grandpa alive, don’t slice and dice images with that same server.
Evision comes with a prebuilt binary of the OpenCV dependency which may take a while to download but in my experience worked great. If you’re running the Livebook this should already be done by now.
This code lets us load images inline in Livebook as we generate them.
# Just a convenience module to inline images
defmodule ShowMeTheEvision do
def show(evision_mat) do
evision_mat
# Most things having to do with images has settled on RGB as the correct format
# But not OpenCV - It is BGR by default so you need to convert it to RGB to be compatible
# With the rest of the kids in the sandbox
|> Evision.cvtColor(Evision.cv_COLOR_BGR2RGB())
|> Evision.Mat.to_nx()
|> StbImage.from_nx()
|> StbImage.to_binary(:png)
|> Kino.Image.new("image/png")
end
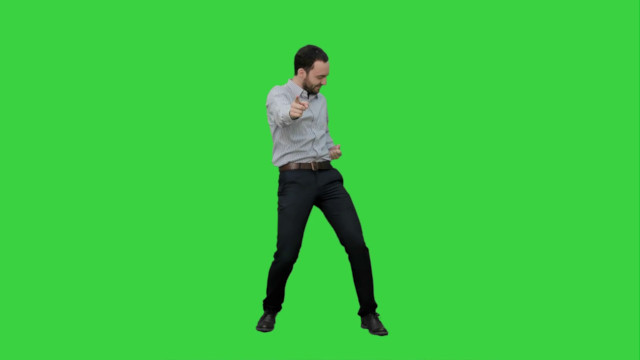
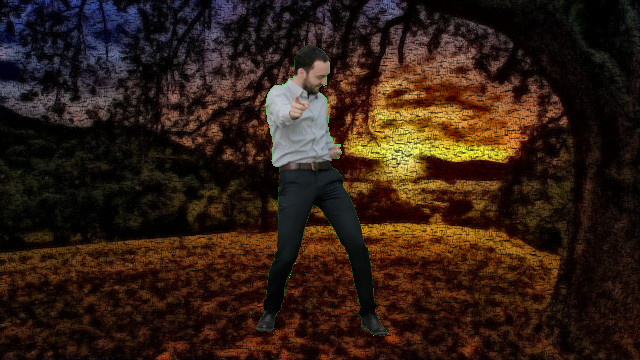
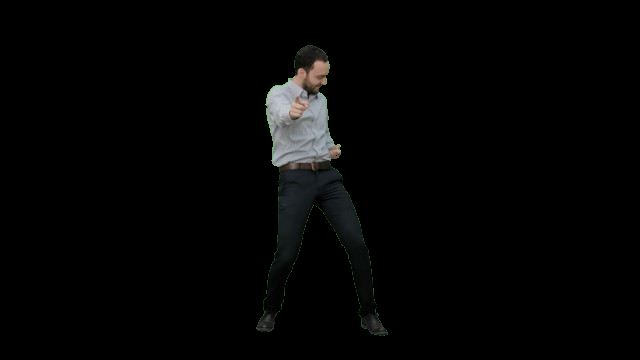
endThis fine looking lad will stand in for me. Let’s call him Dancing Dan. He’s just happy to be here.
fore = Evision.imread(foreground_image)
ShowMeTheEvision.show(fore)
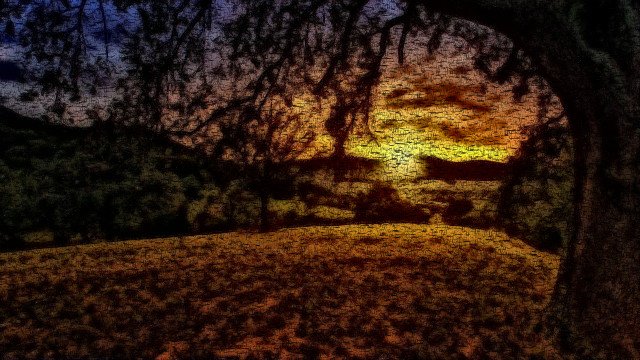
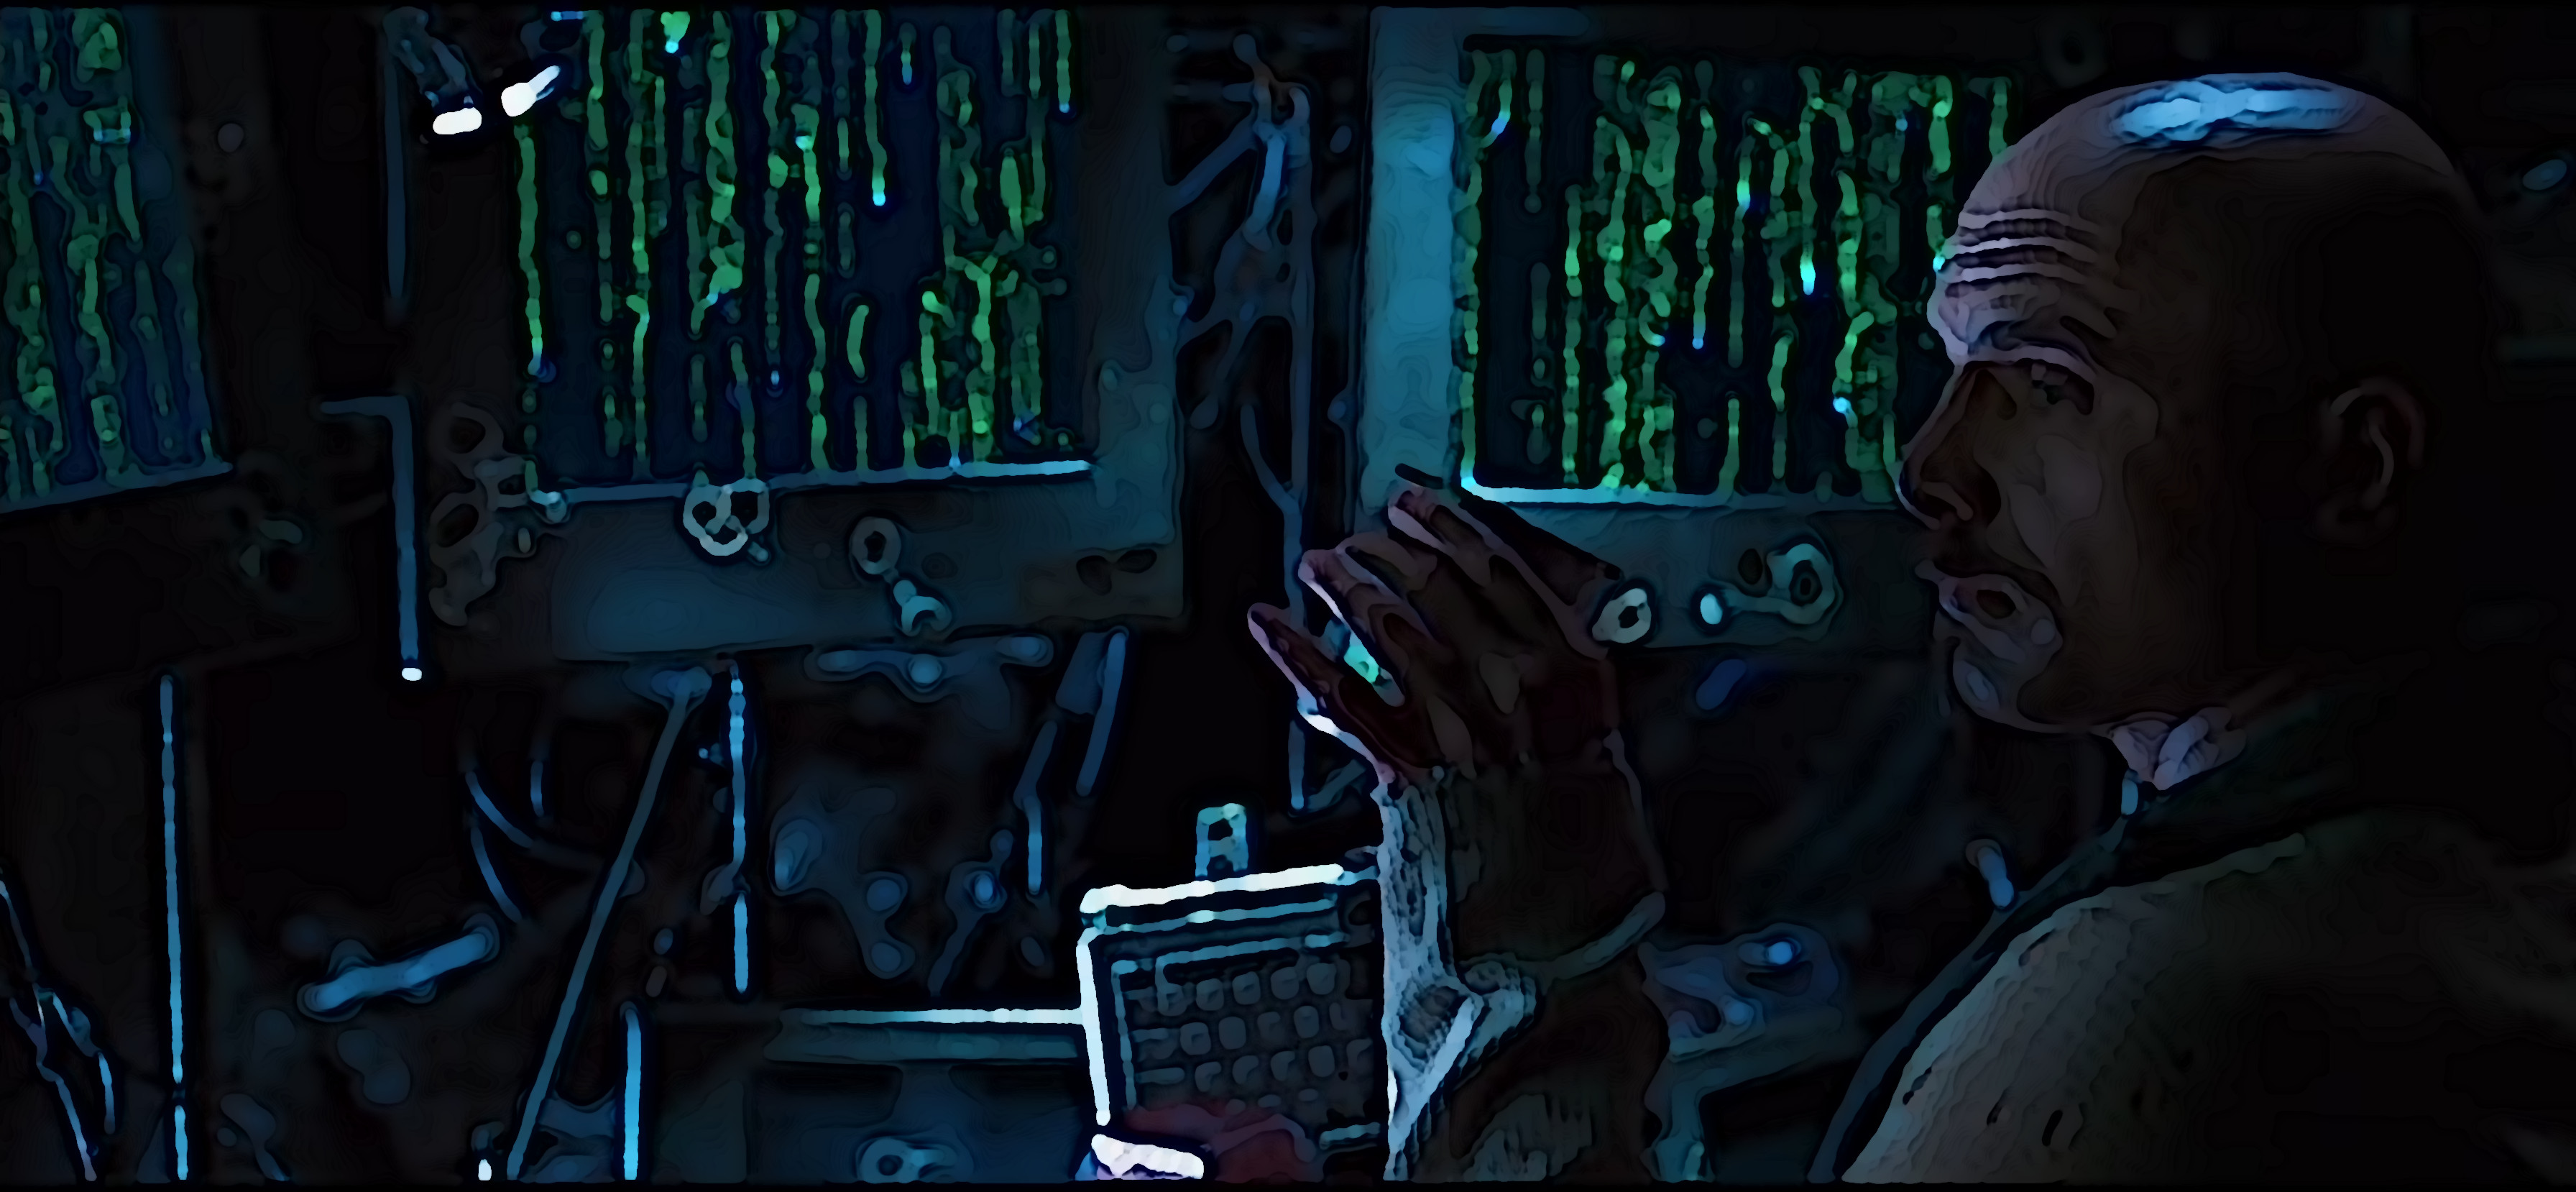
The field of dreams we want our coworkers to think we inhabit.
back = Evision.imread(background_image)
ShowMeTheEvision.show(back)
Here we set up the range of what we are using for the lower bound and upper bound values of green we’ll accept for removal.
# Set the lower bound value to accept as green
l_green =
[0, 100, 0]
|> Nx.tensor(type: {:u, 8})
# Set the upper bound value to accept as green
u_green =
[100, 255, 80]
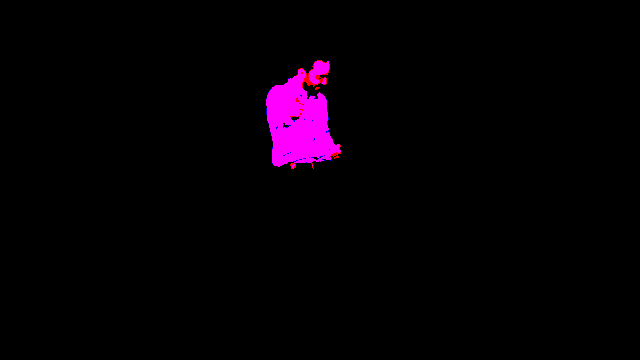
|> Nx.tensor(type: {:u, 8})Evision has kindly given us access to a prebuilt function in OpenCV for this use case of generating a mask from a range.
# Automagically generate the mask of what goes where based on the bounds
mask = Evision.inRange(fore, Evision.Mat.from_nx(l_green), Evision.Mat.from_nx(u_green))
ShowMeTheEvision.show(mask)

Now the mask is applied to the foreground image to clip Dan out. You may notice a green hue. We’ll talk about that later.
# Dancing Dan is clipped out... but notice the green hue.
masked = Evision.Mat.setTo(fore, 0, mask)
ShowMeTheEvision.show(masked)

Now we want to invert the mask so we can clip out the background to avoid conflicts when we merge the two images.
inverted_mask =
  Evision.Mat.full(Evision.Mat.shape(mask), 255, Evision.Mat.type(mask))
  |> Evision.Mat.setTo(0, mask)

ShowMeTheEvision.show(inverted_mask)
When we apply the mask to the background it makes a hole the size of Dancing Dan.
masked_background = Evision.Mat.setTo(back, 0, inverted_mask)

# There's a hole in my soul for a Dancing Dan
ShowMeTheEvision.show(masked_background)
We use bitwise_or to combine the two images.
result = Evision.Mat.bitwise_or(masked, masked_background)
# Together at last!
ShowMeTheEvision.show(result)
My overall experience with Evision was good but it was a bit unstable and crashed several times during development. I was working with 0.1.9 and it’s up to 0.1.18 now. I’m not sure what part in the chain was crashing. Perhaps that’s been fixed now.
The documentation for Evision is quite sparse but the code, as far as I understand, is autogenerated from the OpenCV source so the library is quite massive and filling out the documentation will take some time I suspect. The documentation is acceptable but not stellar. The OpenCV documentation is not particularly generous either so expect a fair amount of trial and error.
If I wanted to do some computer vision task Evision would be the first place I’d look. If I wanted to do image manipulation, it has the capability but that’s not what it’s good at and I wouldn’t find the tradeoff of stability worth it to put it into production. It’s perfectly acceptable for weekend hack projects though.
It would help if you’re already familiar with Python, NumPy and friends as most of the examples out there are in Python. Between Evision and OpenCV docs and Python examples, you’ll likely find what you’re looking for. Evision is the most ‘plug and play’ library in this article. For the most part, you tell it what to do and it does it and it feels relatively straightforward. I didn’t encounter any gotchas, apart from the aforementioned crashes.
Let’s Get Numerical!
I returned to Slack with my finished code and asked if there were any improvements I could make. I mentioned I found Evision to be a bit crashy. Paulo Valente, seeing my finished code said I could probably just use Nx and not use Evision at all. Also it did feel a bit wasteful that I was bringing in a rather large dependency like OpenCV just to barely use it.
Nx was a bit of a head scratcher. I had to revisit some parts of my brain I’d paid little attention to since college. The main resource I used for learnig Nx was Sean Moriarty’s site, specifically the ‘Nx Tip of the Week’ posts. I would highly recommend reading all of these as an Nx basic operations manual. If you’re already familiar with NumPy, tensors or current AI wrangling much of this will already make sense to you.
In Elixir we’re used to dealing with things in parallel, but Nx takes that to the next level as ideally you are using operations that are acting on the whole matrix at the same time. This is because Nx is, if possible, offloading the calculations to the GPU. In Elixir, we would normally see a matrix (tensor) as a list so you’d normally reach for something like Enum.map/2 or Enum.reduce/2 but that’s not how Nx works at all. GPU operations happen in parallel to each other so they all happen at the same time, not one after the other.
This is the type of mental adjustment you’ll need to make to execute operations in Nx.
Here’s the convenience module to display the images.
ShowMeTheNx.show_mask/1 is being a bit tricky as it takes a tensor of all 0s and 1s and amps the 1s to 255s so they show up as full value. If we tried to show without amping them up you might see the difference in a coal mine but nowhere else as they are only off by 1 it’s basically impossible to see. Try changing the values in that function to see what happens if you’re interested in experimentation.
# Just a convenience module to inline images
defmodule ShowMeTheNx do
  def show(tensor) do
    tensor
    |> StbImage.from_nx()
    |> StbImage.to_binary(:png)
    |> Kino.Image.new("image/png")
  end

  # Lets us boost a mask so it can be shown as image
  def show_mask(tensor) do
    Nx.select(
      tensor,
      Nx.broadcast(0, tensor) |> Nx.as_type({:u, 8}),
      Nx.broadcast(255, tensor) |> Nx.as_type({:u, 8})
    )
    |> show()
  end
end
Load and display the foreground image.
# This one's a bit more fiddly - it's not really intended to be an image lib
{:ok, fore_buffer} = File.read(foreground_image)
# Convert the binary into an image
{:ok, fore} = StbImage.read_binary(fore_buffer)
# It's an Nx tensor at this stage
fore_tensor = StbImage.to_nx(fore)

ShowMeTheNx.show(fore_tensor)
Load and display the background.
{:ok, back_buffer} = File.read(background_image)
{:ok, back} = StbImage.read_binary(back_buffer)
back_tensor = StbImage.to_nx(back)
ShowMeTheNx.show(back_tensor)
Define and display the lower bound green. Any green between this and the upper bound is selected for removal.
# Lower bound green
l_green = Nx.broadcast(Nx.tensor([0, 100, 0], type: {:u, 8}), fore_tensor)
ShowMeTheNx.show(l_green)

The upper bound green.
# Upper bound green
u_green = Nx.broadcast(Nx.tensor([100, 255, 95], type: {:u, 8}), fore_tensor)
ShowMeTheNx.show(u_green)

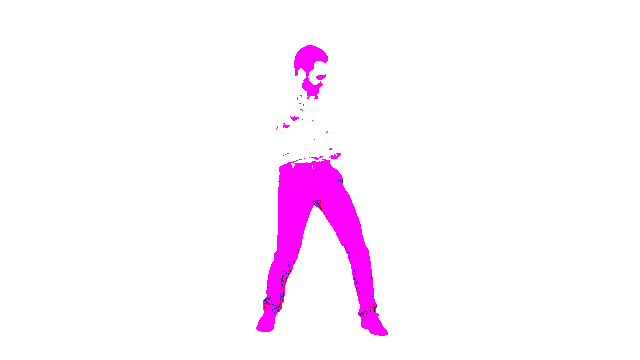
This tells us all of the sub pixel values that are less than the lower bound green. This is half of Dan.
# Pixels with any values that fall below the green threshold
less_than_equal = Nx.less_equal(l_green, fore_tensor)
ShowMeTheNx.show_mask(less_than_equal)

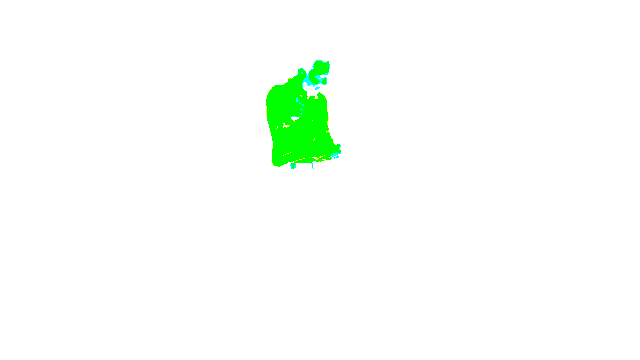
This tells us all of the sub pixel values that are more than the upper bound green. This is the other half of Dan.
# Pixels with any values that fall above the green threshold
greater_than_equal = Nx.greater_equal(u_green, fore_tensor)
ShowMeTheNx.show_mask(greater_than_equal)
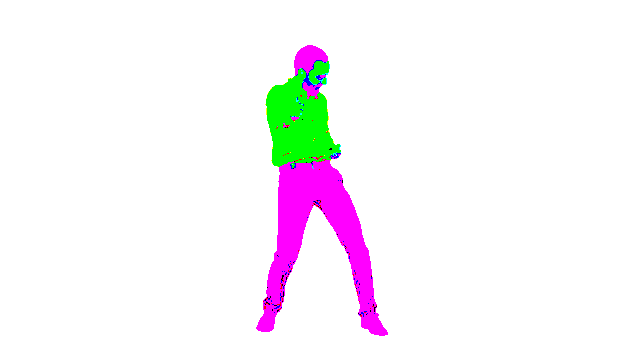
How many values fall outside the bounds of lower bound and upper bound green? This is initially calculated on [r, g, b] sub pixel basis. In the next step we add the two together. Then we logical and across each whole pixel ([r, g, b]) to see which ones are all true. That gives us our black and white mask in the fourth image.
# Now we combine them for a more complete picture
color_fore_mask = Nx.logical_and(less_than_equal, greater_than_equal)
ShowMeTheNx.show_mask(color_fore_mask)
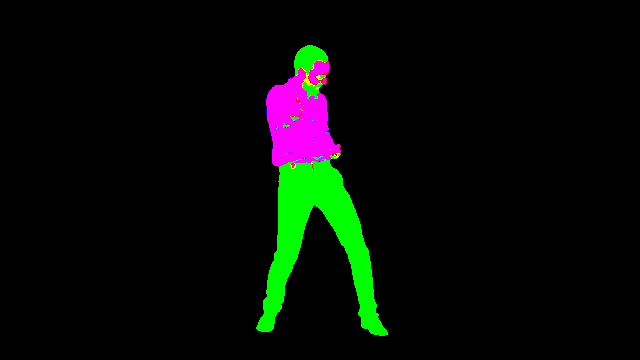
Now we take all of these partial values and crank them to 255 for every pixel that has some value above zero. So our mask is made up of exclusively [0, 0, 0] (black) and [255, 255, 255] (white) pixels.
# Now we only keep those that have 1 in all three [r,g.b] for each pixel
# That is the green area we want to remove
fore_mask =
  color_fore_mask
  |> Nx.all(axes: [:channels])
  |> Nx.broadcast({360, 640, 3}, axes: [:height, :width], names: [:height, :width, :channels])

ShowMeTheNx.show_mask(fore_mask)

Now we combine the foreground and the background using the mask to determine, pixel by pixel, which image to include in the composite.
# We use the mask as a ternary operator on a pixel by pixel basis
# If it's 0 (black) we choose back_tensor / Valhalla
# If it's 1 (white) we choose fore_tensor / Dancing Dan

composite = Nx.select(fore_mask, back_tensor, fore_tensor)
ShowMeTheNx.show(composite)

“But wait!”, I hear you say. “What about that hideous green glow that clings to Dancing Dan?” Let’s try to do something about that.
Here are all the previous steps combined with a subtle difference. For this technique we take off the outer layer(s) of pixel(s) from the clipped image. If you wanted to tune this for your own purposes you could make the {3, 3} window {5, 5} to take out 2 layers of pixels and adjust the placement below it.
By stripping off the outer layer of pixels we get rid of the ones that are ‘not green enough’ to fit in our range. They stil look green so if we just get rid of that layer of pixels it will make it look like a clean clip.
fore_mask =
Nx.logical_and(Nx.less_equal(l_green, fore_tensor), Nx.greater_equal(u_green, fore_tensor))
|> Nx.all(axes: [:channels])
clipped =
fore_mask
# Here we use a window function
# It performs this on every item (pixel) at once
# If any of the neighbors is 1 (black) it also turns to a 1
# This way it erodes the white mask (0s) by 1 pixel
|> Nx.window_max({3, 3})
# clipped is now 2x2 pixels smaller
clipped_fore_mask =
fore_mask
# we have to put the clipped mask on top of the previous mask offset by 1 each way
# so it ends up centred
|> Nx.put_slice([1, 1], clipped)
# Broadcast back out to size of pixel tensor
|> Nx.broadcast({360, 640, 3}, axes: [:height, :width], names: [:height, :width, :channels])
# Combine backgroundand foreground following the mask
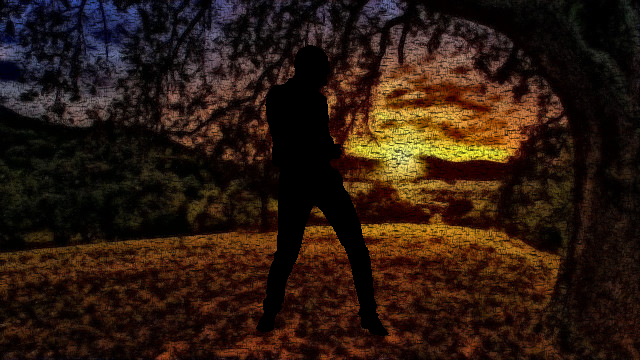
composite = Nx.select(clipped_fore_mask, back_tensor, fore_tensor)
ShowMeTheNx.show(composite)

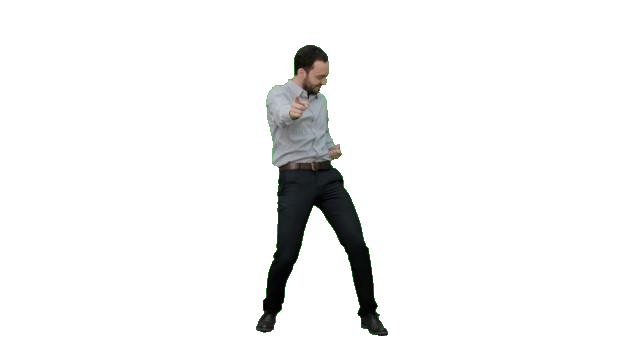
That’s better! Now it’s completely beleivable that Dan is dancing his heart out in the middle of an idyllic field.
Overall, Nx is not designed to be used for images. However, it is utilising the GPU which is designed to be used with images. There may be an opportunity to build a ‘native’ Elixir solution for image manipulation. That would be cool. However, Nx itself is not generally ergonomic for the task as it has no knowledge of images and no special handling of images. If you understand that you’re working on matrices of numbers and you’re happy with that approach it may work fine for you for some image manipulation tasks.
Cold? Headache? Image Manipulation?
There are three very reasonable options for this in Elixir and I wanted to try them all. The last one is using the Image library in combination with Vix which is a set of bindings for libvips which is a library for processing images using vips. It basically competes with imagemagick/graphicsmagick. It’s a very good library with a very involved and attentive author that answered my question within 24 hours on a Sunday.
Vix is similar to Evision in that they are a set of bindings around an already good library. As far as I know Vix gives full access to everything that libvips has to offer. It is not as vast in functions and functionality as Evision/OpenCV but what is there is very solid. If I was putting image manipulation into a production code base this would probably be my choice.
However, due to its very optimised way of running it can take a bit to get into the mindset of the way the library works. If you’re trying to do images serially like batch processing thumbnails in a single queue, you’re unlikely to run into some of the issues I did. It’s tempting to think of each ‘image’ you’re working on as a akin to a layer in Photoshop but it’s not quite that simple. Part of this mindset is thinking like graphic artists. You don’t really want to use masks like we did with Nx. If you’re using it like it expects, you’ll use an alpha channel and set the clipped image to have a transparent background.
You need to install vips on your machine independently whereas Evision just downloads its own binary and does the magic for you which is quite nice.
Something that I found a bit confusing in this instance is what ‘image’ means. Image is the name of the library that wraps Vix. Vix has a submodule called Vix.Vips.Image with the corresponding struct %Vix.Vips.Image{} which represents an image in vips. It’s possibly more accurate to think of this as an image pipeline that gets created when you open the image. You could also think of it as the image memory as it is using mutability to mutate the image in place.
This is another mindset adjustment to make for Elixir programmers as it is using mutability as much as possible for performance reasons. It’s best to understand that you’re operating on the vips image pipeline with Elixir shaped handles. It doesn’t obey Elixir conventions.
Livebook App Caveat
If vips/Vix is not working for you on a Mac using the standalone app you may need to:
- Get the nightly build
-
Add an environment variable, under settings, to any tool chain required. In testing it needed
/usr/local/bin. Livebook is smart enough to know to append it to the current env variable.
Thanks to Kip Cole for testing on Mac.
It has been tested in Windows and it works for at least one user:
- Have libvips-dev installed so vips is available via system command
- Make sure Livebook can call vips, so it needs to be on the PATH and Livebook needs to see the PATH
Thanks to Lucas San Román for testing on Windows using WSL2.
I have tested on Debian Linux and it worked just by installing libvips-dev with:
sudo apt install libvips-dev
Here’s the same inline image module adapted to Vix so we can show the images inline as we write them.
defmodule ShowMeTheVix do
  def show(%Vix.Vips.Image{} = image) do
    {:ok, image_bin} = Vix.Vips.Image.write_to_buffer(image, ".png")
    Kino.Image.new(image_bin, "image/png")
  end
end
This first one is my hamfisted attempt while thinking I should do it like I did with Nx. Skip to the second example in this section to understand how the library expects you to use it.
Also, learn from my pain. If you get an error like:
** (MatchError) no match of right hand side value: {:error, "Failed to write VipsImage to buffer"}
change how you’re opening the file to access: :random as the second argument.
In general be aware that how you open an image affects the rest of the behaviour of the image as you process it.
I believe Image now opens an image with access: :random by default.
This may be extraneous to most people but there are various ways to open an image in vips that will impact how it will be processed. The direct access method which is the default for vips did not work for me as it only opens one pipeline but I needed two as I’m trying to composite two images.
Once again, load and display the foreground image.
{:ok, fore} = Image.open(foreground_image, access: :random)
ShowMeTheVix.show(fore)
Loading the background.
{:ok, back} = Image.open(background_image, access: :random)

ShowMeTheVix.show(back)
Since variety is the spice of life we can take the opposite approach as we did with the Nx version we select and show the values that are above the lower threshold.
# Lower bound green
{:ok, l_green} = Image.Math.greater_than(fore, [0.0, 100.0, 0.0])
ShowMeTheVix.show(l_green)
All the values that are below the upper threshold.
# Upper bound green
{:ok, u_green} = Image.Math.less_than(fore, [100.0, 255.0, 95.0])
ShowMeTheVix.show(u_green)
Now we mash the two together to create what will become the mask.
# Combining the upper and lower bounds
{:ok, color_fore_mask} = Image.Math.boolean_and(l_green, u_green)
ShowMeTheVix.show(color_fore_mask)
Now we polarize all the values as in previous examples.
# We're trying to create a boolean mask
# vips uses this term of 'band' a lot to refer to r, g, b or a
# Similar to the Nx example I want to 'and' across all of r,g,b per pixel
{:ok, fore_mask} = Vix.Vips.Operation.bandbool(color_fore_mask, :VIPS_OPERATION_BOOLEAN_AND)
ShowMeTheVix.show(fore_mask)

As before, we’ll need an inverted mask.
# Invert the mask to clip the background
{:ok, inverted_fore_mask} = Vix.Vips.Operation.invert(fore_mask)
ShowMeTheVix.show(inverted_fore_mask)
Apply the mask to the foreground.
# Clip out Dan the Man
{:ok, masked} = Image.Math.subtract(fore, fore_mask)
ShowMeTheVix.show(masked)
Apply the mask to the background.

# There's a Dan sized hole
{:ok, masked_back} = Image.Math.subtract(back, inverted_fore_mask)
ShowMeTheVix.show(masked_back)

Then, as before we can combine them. However, there are some indications that we’re imposing a foreign mindset on vips. We’re forcing it to create a copy which it doesn’t want to do. Nonetheless, this way works but there must be a better way.
# There are lots of indications that we're doing something wrong
# We're forcing it to create a copy which vips doesn't want you to do
# Because creating copies is inefficient
{:ok, masked_bin} = Vix.Vips.Image.write_to_buffer(masked, ".jpg")
{:ok, masked_clone} = Vix.Vips.Image.new_from_buffer(masked_bin)

{:ok, masked_back_bin} = Vix.Vips.Image.write_to_buffer(masked_back, ".jpg")
{:ok, masked_back_clone} = Image.from_binary(masked_back_bin)

# Finally combining them by adding the two together
# Once again this is not the vips way
# Adding works because black is [0.0.0] so whatever you add to it is going to
# essentially overwrite
{:ok, comp} = Vix.Vips.Operation.add(masked_back_clone, masked_clone)

ShowMeTheVix.show(comp)

We’re getting close to the way you should actually perform this task. Thanks for sticking it out on our learning adventure. :rainbow:
Next up, we have a far more native vips implementation. Instead of using the mask to turn the part of the image we don’t want black, we just turn it transparent using the alpha channel. If you want to prove it to yourself, copy paste the below image into an editor and you can see the area around Dan is transparent.
# Using this method only requires one pipeline so no special args needed
# However, vips only gives one render per pipeline so to render it twice down below we
# still need them here
{:ok, fore} = Image.open(foreground_image, access: :random)

{:ok, back} = Image.open(background_image, access: :random)

# This next bit is the same
# Lower bound green
{:ok, l_green} = Image.Math.greater_than(fore, [0.0, 100.0, 0.0])
# Upper bound green
{:ok, u_green} = Image.Math.less_than(fore, [100.0, 255.0, 95.0])

{:ok, color_fore_mask} = Image.Math.boolean_and(l_green, u_green)

{:ok, fore_mask} = Vix.Vips.Operation.bandbool(color_fore_mask, :VIPS_OPERATION_BOOLEAN_AND)

{:ok, inverted_fore_mask} = Vix.Vips.Operation.invert(fore_mask)

# This replaces the whole janky mess with force copying
# Also as bandjoin is creating an alpha layer and using the mask to determine what should
# be transparent so there's no need to clip the background
{:ok, masked_person} = Vix.Vips.Operation.bandjoin([fore, inverted_fore_mask])

ShowMeTheVix.show(masked_person)

Now you can just paste the partially transparent version of Dan onto the background which doesn’t need to be cut out because vips does sensible things when you put a transparent image on top of another one.
# compose mashes the two images together and because it's a lib that's designed for images
# it understands what to do with transparent sections

{:ok, comp} = Image.compose(back, masked_person)
ShowMeTheVix.show(comp)

You Promised Some Copy Paste?
I was discussing various aspects with the author of Image, Kip Cole. He was helping me out with these various formulations and tribulations so he just built it into his library.
All the previous steps are now built into one function call.
{:ok, fore} = Image.open(foreground_image, access: :random)

{:ok, clipped} =
  Image.chroma_key(fore,
    greater_than: [0.0, 100.0, 0.0],
    less_than: [100.0, 255.0, 95.0]
  )

ShowMeTheVix.show(clipped)

Or you can use an alternative strategy of picking a median color and a threshold which takes all the values up and down of that median.
# Alternative strategy
{:ok, clipped} =
  Image.chroma_key(fore,
    threshold: 30,
    color: [59.0, 210.0, 66.0]
  )

ShowMeTheVix.show(clipped)

Or you can do next to nothing and just let the library figure it out for you.
# Or you can let it guess everything including the background
{:ok, clipped} = Image.chroma_key(fore)

ShowMeTheVix.show(clipped)
Use one of the above in combination with compose which composites it onto the background.
# Pick the one you like and mash it together with compose
{:ok, comp} = Image.compose(back, clipped)
ShowMeTheVix.show(comp)

If you’re interested, Kip is actively developing Image and he’s taking requests on what to include! I asked for a meme generator and he built it!
{:ok, comp} = Image.meme(comp, "Dancing", text: "with all my friends!")
ShowMeTheVix.show(comp)
The Case for Livebook
I used Livebook for all three of these experiments start to finish and it worked great. Running your code in little chunks for this type of prototyping is amazing. However, the error messages could be improved as it doesn’t point you to the line that’s causing the problem. You just have to start eliminating code until you find it or actually understand what your code is doing. For this type of project I found it extremely convenient. The added benefit of having nicely documented code is a huge bonus. For this type of project specifically it’s actually better than the typical go to for OpenCV of imshow which just displays the image once in a popup but you lose it when you close the window. With Kino able to display the images inline, it’s a great way to keep track of where you’re at. I hope I demonstated that displaying the results of intermediate steps in the algorithm is a great way to understand more intuitively what’s happening.
To keep you from losing work in a Livebook like I did, save it with Ctrl/Cmd + s and choose the autosave option. All bets are off if you stop your Livebook server without having saved the Livebook first.
The Choice is Yours
Each of the options has its own advantages but it’s not like you have to choose just one. Evision and Vix have interoperability with Nx so there’s no reason you couldn’t use all three together. It’s helpful to recognise the intended use of the underlying library. Nx is intended for manipulating tensors primarily with machine learning in mind. OpenCV is for computer vision. Vips is straight up image manipulation. Pick what works best for your use case.
With regards to documentation, none of the options are abundant.
With Nx it’s so new, it’s still in the development stage. The docs are good but minimal.
As for Evision and Vix (Image), the online docs are reasonable if not minimal. The underlying libraries are also out there and Python examples can typically be transcribed straight across. Python is not difficult to parse even if you don’t ‘know’ it so I don’t think this is a huge barrier. If you’ve ever dealt with a library of bindings this will feel familiar. Once you figure out the mapping it’s fine.
If you already have some experience with doing these types of tasks in Python using NumPy, OpenCV and/or libvips, you’ll be ahead of the game. I wouldn’t recommend this as a learning activity for Elixir unless you’re already an expert in one of the above, in which case, carry on. If you are already well versed in Elixir there is a slight but very achievable learning curve. As mentioned, you’ll need to branch out from your usual Elixir skillset and be able to adopt the mindset of the underlying library you’re using.
I Now Return to My Yak
I hear you hypothetically saying… “You started with trying to create a chroma key filter for your video feed but you’ve just chroma keyed the same image over and over! Don’t you know you’re going to have to do this process like 30x a second with almost no latency?” Yes, imaginary incensed reader I will have to do something like that. So yes, Elixir in a loop calling Vix repeatedly is likely not going to cut the proverbial poptart. For the next stage I’m planning on bringing in Zig via Zigler to call vips which will all be masterminded by Elixir. Stay tuned for that adventure.